本文最后更新于 92 天前,其中的信息可能已经过时,如有错误请发送邮件到 tudougin@163.com
- ESP32 的 Flash 采用 分区表(Partition Table) 来管理存储空间。
- 分区表记录了各个 固件、数据存储区、文件系统 的起始地址、大小和类型。
- ESP32 启动时,会根据分区表找到 合适的固件和数据 进行加载。
| 选项 | 说明 | 推荐设置 |
|---|
CONFIG_PARTITION_TABLE_SINGLE_APP | 适用于单应用模式 | 适合不需要 OTA 的应用 |
CONFIG_PARTITION_TABLE_TWO_OTA | 适用于 OTA 升级(默认) | 适合需要 OTA 的应用 |
CONFIG_PARTITION_TABLE_CUSTOM | 自定义分区表 | 适合需要特定分区布局的应用 |
CONFIG_PARTITION_TABLE_OFFSET | 分区表起始地址(通常 0x8000) | 默认即可,不建议修改 |
分区表是一个 CSV 文件,包含如下字段:
| |
| nvs, data, nvs, 0x9000, 0x5000, |
| otadata, data, ota, 0xe000, 0x2000, |
| phy_init, data, phy, 0xf000, 0x1000, |
| factory, app, factory, 0x10000, 1M, |
| ota_0, app, ota_0, 0x110000, 1M, |
| ota_1, app, ota_1, 0x210000, 1M, |
| spiffs, data, spiffs, 0x290000, 512K, |
主要字段说明:
- Name(名称):该分区的名称 CSV
- Type(类型):
app(固件)、data(数据存储)
- SubType(子类型):例如
factory、ota_0、nvs
- Offset(起始地址):该分区在 Flash 中的起始位置
- Size(大小):该分区的大小(例如
1M)
- Flags(标志位):通常为空
- 固件启动机制
ESP32 启动时,会从分区表中查找 otadata,并从 Factory 或 OTA 分区启动固件。
- OTA 机制
otadata 记录 当前激活的 OTA 分区- OTA 更新后,ESP32 重新启动时,会 切换到新的 OTA 分区
- NVS 数据存储
NVS 分区用于存储 Wi-Fi 配置、设备参数等- 使用
esp_partition_read() 可以读取 NVS 分区数据
- 文件系统支持
- ESP32 支持
SPIFFS 和 FAT 文件系统,数据存储在 data 类型的分区中
- 例如
spiffs 分区用于存储日志或用户数据
- 自定义分区
- 用户可以修改
partitions.csv 文件,自定义分区
- 例如添加
用户数据 分区,存储私有数据
使用 esptool.py 读取分区表:
| esptool.py --chip esp32 read_flash 0x8000 0xC00 partition-table.bin |
然后用 hexdump 查看:
| hexdump -C partition-table.bin |
或者
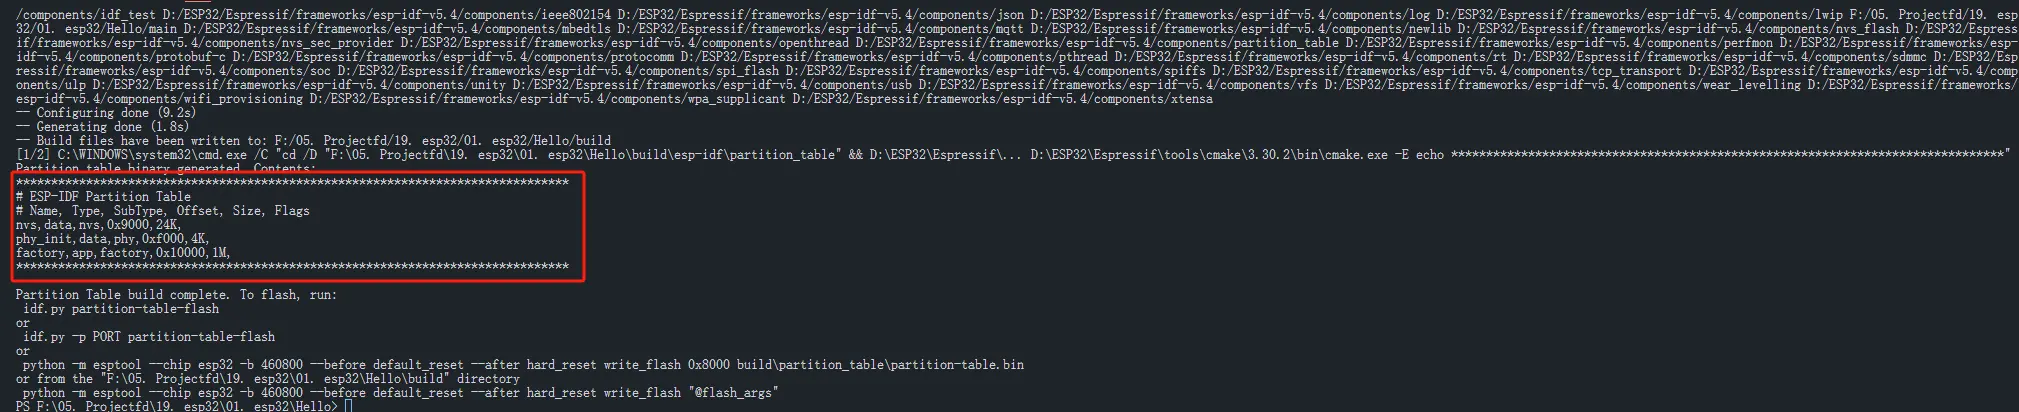
| idf.py partition-table |
| |
| Partition table binary generated. Contents: |
| ******************************************************************************* |
| # ESP-IDF Partition Table |
| # Name, Type, SubType, Offset, Size, Flags |
| nvs,data,nvs,0x9000,24K, |
| phy_init,data,phy,0xf000,4K, |
| factory,app,factory,0x10000,1M, |
| ******************************************************************************* |
| |
- 修改
partitions.csv 文件
- 重新编译 ESP-IDF 工程:
- 选择 Partition Table → Custom CSV
- 运行:
不知道为什么,我在 idf.py flash 时无法访问,修改失败……
使用 menuconfig,见 2.1.3
ESP-IDF 提供了一系列 API 来操作分区表:
| API 函数 | 作用 |
|---|
esp_partition_find_first() | 查找分区 |
esp_partition_get() | 获取分区信息 |
esp_partition_read() | 读取数据 |
esp_partition_write() | 写入数据 |
esp_partition_erase_range() | 擦除数据 |
esp_partition_mmap() | 映射 Flash 分区到 RAM |
用于根据类型、子类型或名称查找 Flash 分区。
| const esp_partition_t *esp_partition_find_first(esp_partition_type_t type, esp_partition_subtype_t subtype, const char *label); |
参数说明:
type:分区类型(ESP_PARTITION_TYPE_APP 或 ESP_PARTITION_TYPE_DATA)subtype:分区子类型(如 ESP_PARTITION_SUBTYPE_DATA_NVS)label:分区名称(NULL 表示忽略)
返回值:
- 成功:返回
esp_partition_t 结构体指针
- 失败:返回
NULL
示例:查找 nvs 分区
| const esp_partition_t *nvs_partition = esp_partition_find_first(ESP_PARTITION_TYPE_DATA, ESP_PARTITION_SUBTYPE_DATA_NVS, NULL); |
| if (nvs_partition) { |
| printf("找到 NVS 分区,大小:%d bytes\n", nvs_partition->size); |
| } |
| esp_partition_iterator_t esp_partition_find(esp_partition_type_t type, esp_partition_subtype_t subtype, const char *label); |
作用:
- 获取多个匹配的分区,需要使用
esp_partition_get 遍历
示例:获取所有 OTA 分区
| esp_partition_iterator_t it = esp_partition_find(ESP_PARTITION_TYPE_APP, ESP_PARTITION_SUBTYPE_APP_OTA_MIN, NULL); |
| while (it != NULL) { |
| const esp_partition_t *part = esp_partition_get(it); |
| printf("找到 OTA 分区:%s,大小:%d bytes\n", part->label, part->size); |
| it = esp_partition_next(it); |
| } |
| esp_partition_iterator_release(it); |
| esp_err_t esp_partition_read(const esp_partition_t *partition, size_t src_offset, void *dst, size_t size); |
参数:
partition:目标分区src_offset:读取的偏移地址dst:目标缓冲区size:读取数据的大小
示例:读取 NVS 分区前 16 字节
| uint8_t buffer[16]; |
| esp_partition_read(nvs_partition, 0, buffer, sizeof(buffer)); |
| printf("读取数据: "); |
| for (int i = 0; i < sizeof(buffer); i++) { |
| printf("%02X ", buffer[i]); |
| } |
| printf("\n"); |
| esp_err_t esp_partition_write(const esp_partition_t *partition, size_t dst_offset, const void *src, size_t size); |
示例:写入数据到 NVS 分区
| uint8_t data[16] = {0xA5, 0x5A, 0x3C, 0xC3}; // 示例数据 |
| esp_partition_write(nvs_partition, 0, data, sizeof(data));c |
| printf("数据已写入 NVS 分区。\n"); |
注意:
| esp_err_t esp_partition_erase_range(const esp_partition_t *partition, size_t start_addr, size_t size); |
示例:擦除整个 NVS 分区
| esp_partition_erase_range(nvs_partition, 0, nvs_partition->size); |
| printf("NVS 分区已擦除。\n"); |
用于 提高读取效率,将 Flash 映射到 RAM。
| esp_err_t esp_partition_mmap(const esp_partition_t *partition, size_t offset, size_t size, spi_flash_mmap_memory_t memory, const void **out_ptr, spi_flash_mmap_handle_t *out_handle); |
示例:映射 OTA_0 分区
| const esp_partition_t *ota_partition = esp_partition_find_first(ESP_PARTITION_TYPE_APP, ESP_PARTITION_SUBTYPE_APP_OTA_0, NULL); |
| const void *mapped_addr; |
| spi_flash_mmap_handle_t handle; |
| esp_partition_mmap(ota_partition, 0, ota_partition->size, SPI_FLASH_MMAP_DATA, &mapped_addr, &handle); |
| printf("分区映射到 RAM 地址:%p\n", mapped_addr); |
注意:
- 只能 读取 映射到 RAM 的数据,无法直接写入。
- 需要调用
spi_flash_munmap(handle); 释放映射。
| #include <stdio.h> |
| #include "esp_system.h" |
| #include "esp_spi_flash.h" |
| #include "esp_partition.h" |
| |
| void app_main() { |
| |
| const esp_partition_t *nvs_partition = esp_partition_find_first(ESP_PARTITION_TYPE_DATA, ESP_PARTITION_SUBTYPE_DATA_NVS, NULL); |
| if (nvs_partition == NULL) { |
| printf("未找到 NVS 分区!\n"); |
| return; |
| } |
| printf("找到 NVS 分区,大小:%d bytes\n", nvs_partition->size); |
| |
| |
| esp_partition_erase_range(nvs_partition, 0, nvs_partition->size); |
| printf("NVS 分区已擦除。\n"); |
| |
| |
| uint8_t write_data[16] = {0xAA, 0xBB, 0xCC, 0xDD}; |
| esp_partition_write(nvs_partition, 0, write_data, sizeof(write_data)); |
| printf("数据已写入。\n"); |
| |
| |
| uint8_t read_data[16]; |
| esp_partition_read(nvs_partition, 0, read_data, sizeof(read_data)); |
| |
| printf("读取数据: "); |
| for (int i = 0; i < sizeof(read_data); i++) { |
| printf("%02X ", read_data[i]); |
| } |
| printf("\n"); |
| } |
对于 ESP32 的个性化组件,它的核心思想就是 模块化封装已经完成的功能,让代码更加清晰、可复用,并方便不同项目使用。
 组件化的关键点
1. 逻辑上独立:一个组件通常是一个完整的功能模块,例如 LED 控制、MQTT 通信、传感器驱动 等。 2. 代码组织良好:一个组件通常包含 头文件(.h)、实现文件(.c)、CMakeLists.txt 和可选的 Kconfig。 3. 易于移植:封装好后,只需要 在不同项目里添加组件目录,就能直接使用,而无需修改主程序。 4. 可扩展:可以在 menuconfig 里提供个性化配置,例如 GPIO 引脚、调试选项、通信参数 等。
什么是组件?
- 源代码(
.c / .cpp 文件)
- 头文件(
.h 文件)
- 组件配置(
Kconfig 文件)
- 组件的 CMake 构建脚本(
CMakeLists.txt)
一个 ESP32 工程是由多个组件组成的,组件可以是官方 ESP-IDF 提供的,也可以是自定义的。
组件的基本目录结构:
| ├── my_project/ |
| │ ├── CMakeLists.txt |
| │ ├── sdkconfig |
| │ ├── main/ |
| │ │ ├── CMakeLists.txt |
| │ │ ├── Kconfig |
| │ │ ├── main.c |
| │ ├── components/ |
| │ │ ├── my_component/ |
| │ │ │ ├── CMakeLists.txt |
| │ │ │ ├── Kconfig |
| │ │ │ ├── include/ |
| │ │ │ │ ├── my_component.h |
| │ │ │ ├── my_component.c |
| │ │ │ ├── README.md |
components/ 目录用于存放自定义组件,每个组件都是一个独立的模块。include/ 目录存放组件的对外头文件,其他组件可以 #include 这些头文件。src/ 目录存放 C/C++ 源文件。CMakeLists.txt 用于注册组件,使 ESP-IDF 识别并构建组件。Kconfig 文件(可选),用于在 menuconfig 中提供组件的可配置选项。
| idf.py create-component <component name> |
此命令将创建一个新的组件,包含构建所需的最基本文件集。使用 -C 选项可指定组件创建目录。
| idf.py -C components create-component BlinkLED |
| ├── my_project/ |
| │ ├── components/ |
| │ │ ├── BlinkLED/ |
| │ │ │ ├── CMakeLists.txt |
| │ │ │ ├── Kconfig |
| │ │ │ ├── include/ |
| │ │ │ │ ├── BlinkLED.h |
| │ │ │ ├── BlinkLED.c |
| │ │ │ ├── README.md |
其中:
led_blink.c:LED 闪烁的具体实现led_blink.h:LED 组件的头文件CMakeLists.txt:组件的 CMake 配置Kconfig:组件的 Kconfig 配置(可选)README.md:组件的 readme 文件(可选)
| #ifndef BLINKLED_H |
| #define BLINKLED_H |
| |
| #ifdef __cplusplus |
| extern "C" { |
| #endif |
| |
| #include <stdint.h> |
| #include "driver/gpio.h" |
| |
| |
| #define GPIO_OUTPUT_PIN CONFIG_LED_BLINK_GPIO |
| #define LED_DELAY_MS CONFIG_LED_BLINK_INTERVAL |
| |
| void setup_gpio(void); |
| void gpio_LED_level(int led_state); |
| |
| #ifdef __cplusplus |
| } |
| #endif |
| |
| #endif |
| #include <stdio.h> |
| #include "esp_log.h" |
| #include "freertos/FreeRTOS.h" |
| #include "freertos/task.h" |
| #include "driver/gpio.h" |
| #include "BlinkLED.h" |
| |
| |
| static const char* TAG = "LED_CONTROL"; |
| |
| void setup_gpio() { |
| |
| gpio_config_t io_conf = { |
| .pin_bit_mask = (1ULL << GPIO_OUTPUT_PIN), |
| .mode = GPIO_MODE_OUTPUT, |
| .pull_up_en = GPIO_PULLUP_DISABLE, |
| .pull_down_en = GPIO_PULLDOWN_DISABLE, |
| .intr_type = GPIO_INTR_DISABLE |
| }; |
| |
| |
| gpio_config(&io_conf); |
| } |
| |
| void gpio_LED_level(int led_state) { |
| gpio_set_level(GPIO_OUTPUT_PIN, led_state); |
| |
| |
| ESP_LOGI(TAG, "LED is %s", led_state ? "ON" : "OFF"); |
| } |
在 components/BlinkLED/CMakeLists.txt 中注册组件:
| idf_component_register(SRCS "BlinkLED.c" |
| INCLUDE_DIRS "include" |
| REQUIRES "driver") |
在 idf_component_register 里,REQUIRES 的作用是 声明当前组件的依赖关系,确保编译时会正确引入相关的 ESP-IDF 组件。
解释 REQUIRES "driver"
这表示 当前组件依赖于 driver 组件,也就是说:
- 在 编译时,ESP-IDF 会自动引入
driver 组件及其头文件和库文件。
- 在 链接时,ESP-IDF 会确保
driver 组件的代码正确链接进可执行文件。
- 这样,可以在
BlinkLED.c 里 直接使用 driver 组件的 API,比如 gpio_set_level()、gpio_config() 等,而无需手动指定 driver 组件的路径。
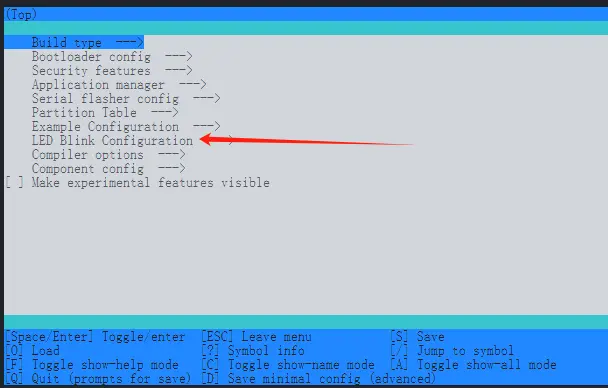
需要 menuconfig 配置 LED 引脚和闪烁间隔,可以在 components/BlinkLED/Kconfig 中添加:
| menu "LED Blink Configuration" |
| |
| config LED_BLINK_ENABLED |
| bool "Enable LED Auto Blink" |
| default y |
| help |
| Select whether to enable the LED auto-blinking feature. |
| |
| config LED_BLINK_GPIO |
| int "LED GPIO Pin Number" |
| range 0 40 |
| default 2 |
| help |
| Configure the GPIO pin number where the LED is connected (ESP32 supports 0~40). |
| |
| config LED_BLINK_INTERVAL |
| int "LED Blink Interval (ms)" |
| range 100 5000 |
| default 1000 |
| help |
| Configure the LED blinking interval in milliseconds. |
| |
| endmenu |
| idf_component_register(SRCS "main.c" |
| INCLUDE_DIRS "." |
| REQUIRES BlinkLED) |
| #include "freertos/FreeRTOS.h" |
| #include "freertos/task.h" |
| #include "esp_log.h" |
| #include "BlinkLED.h" |
| |
| void app_main(void) { |
| |
| setup_gpio(); |
| |
| int led_state = 0; |
| |
| |
| while (1) { |
| |
| led_state = !led_state; |
| |
| gpio_LED_level(led_state); |
| |
| |
| vTaskDelay(LED_DELAY_MS / portTICK_PERIOD_MS); |
| } |
| } |
- 安装和更新:可以从 Espressif 组件仓库(components.espressif.com)或 GitHub 下载开源组件。
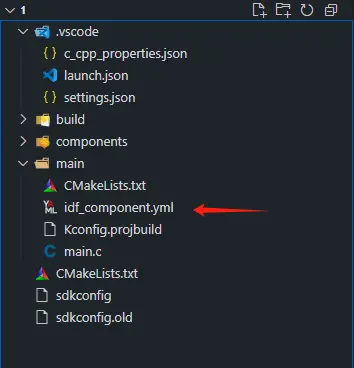
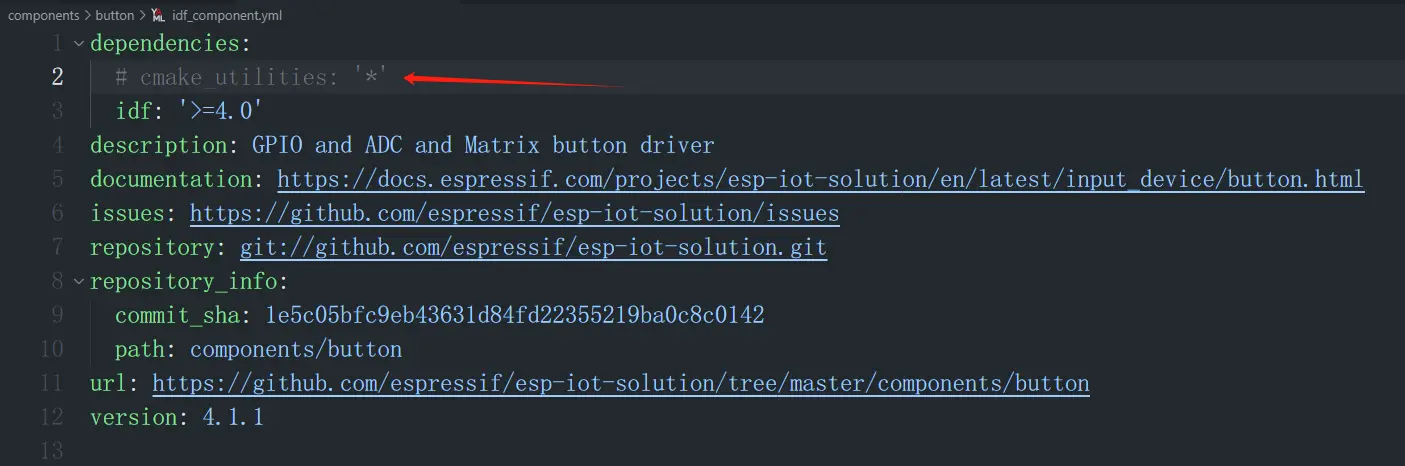
- 管理依赖:组件的
idf_component.yml 文件定义了 所需依赖,ESP-IDF 会自动下载它们。
- 复用代码:减少重复开发,提高代码模块化程度。
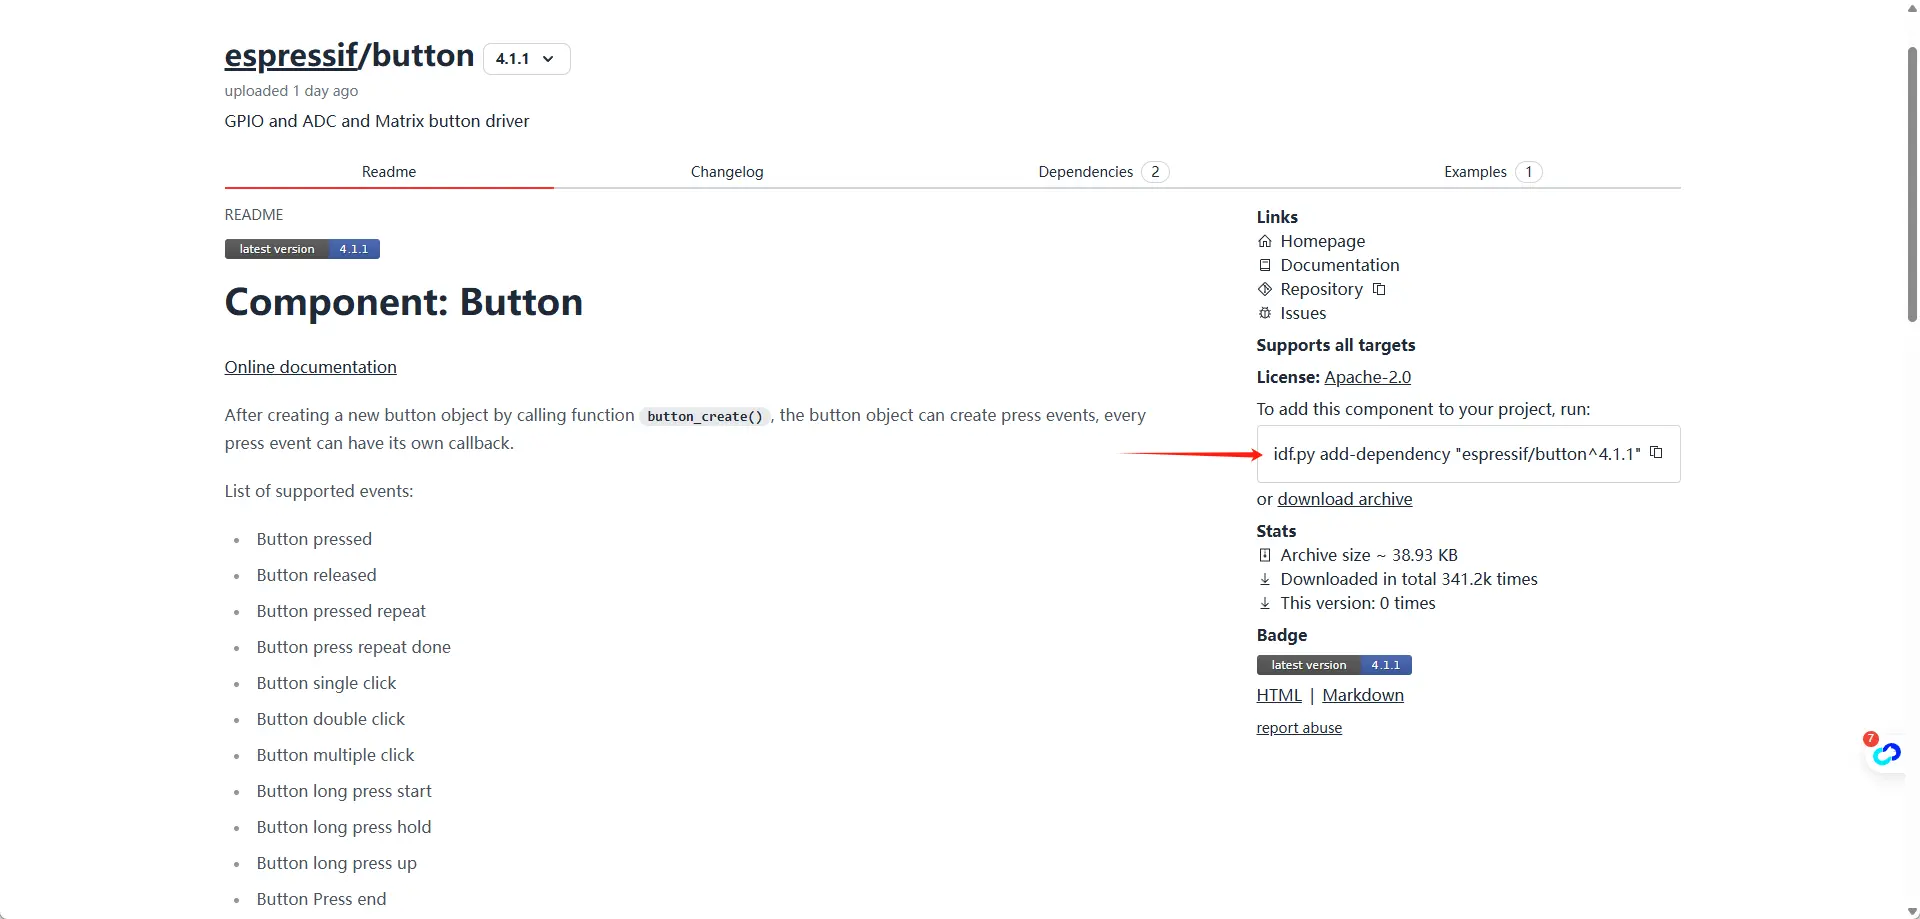
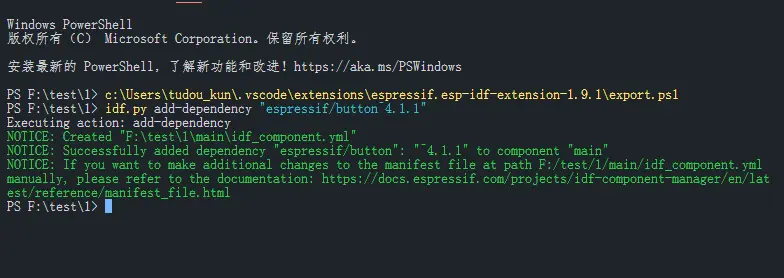
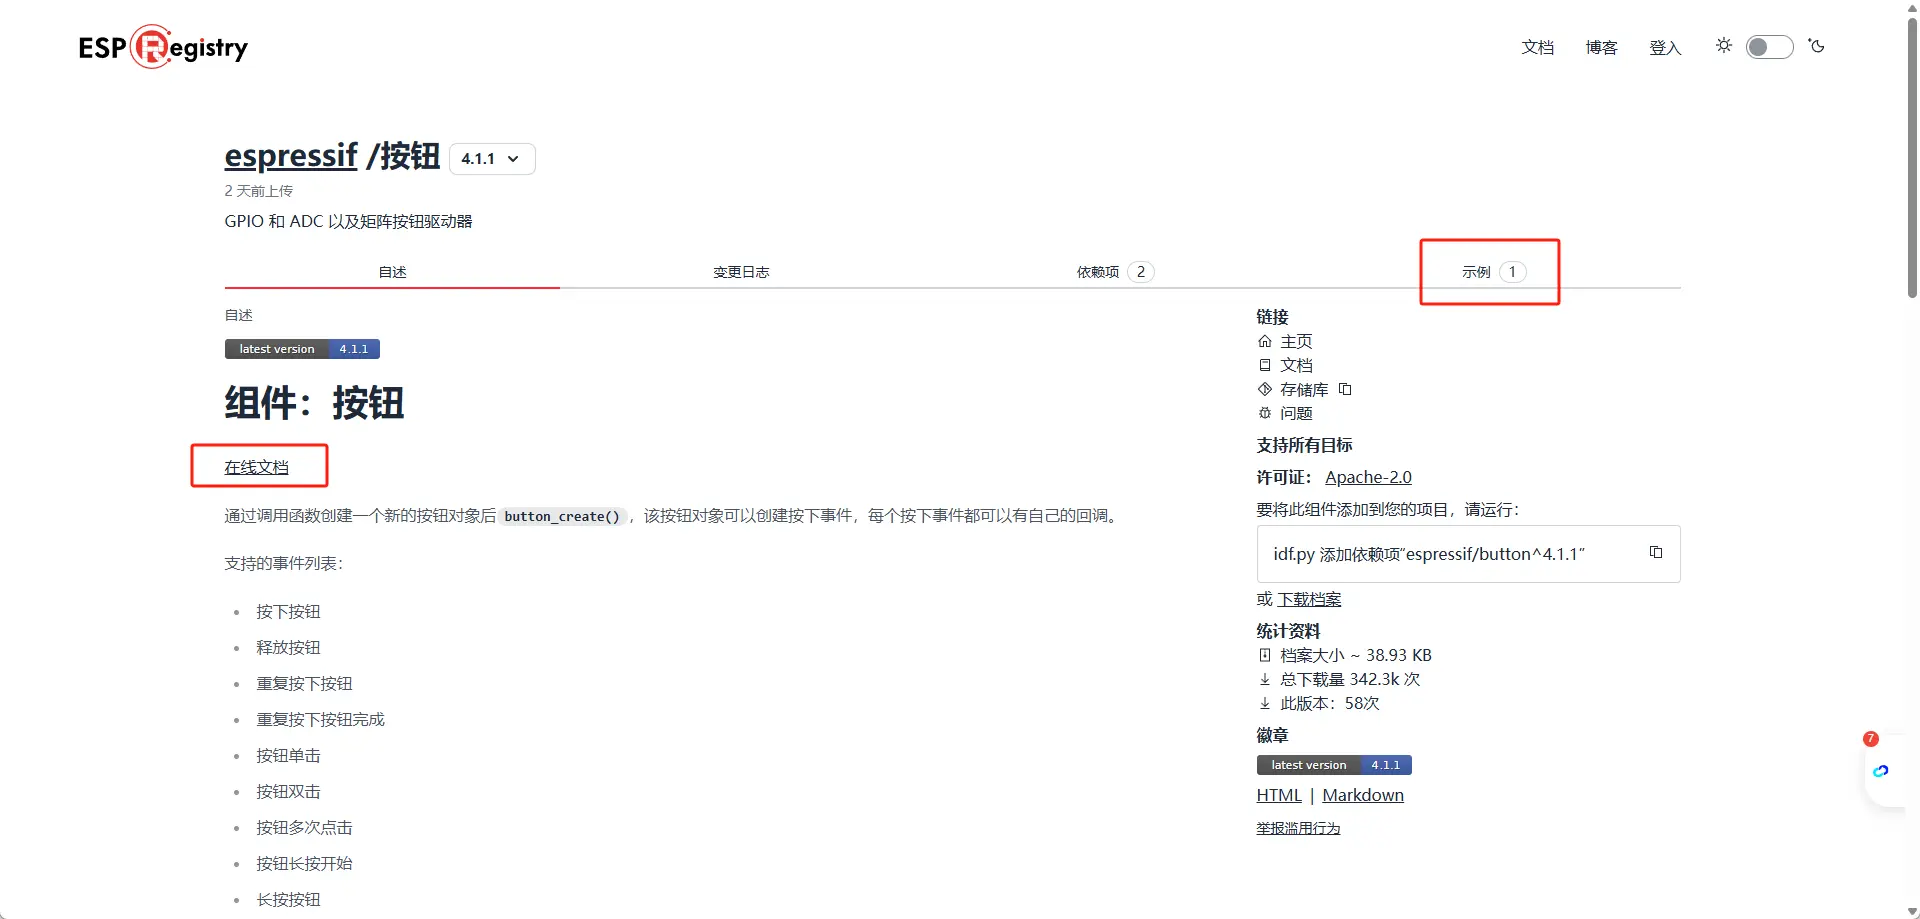
以 espressif/button 为例:https://components.espressif.com/components/espressif/button
- 运行下列指令,将组件添加到工程中。
| idf.py add-dependency "espressif/button^4.1.1" |
- 此时点击构建工程则会自动联网获取组件内容:
可以从下面两个途径下载组件文件
Espressif 组件仓库  components.espressif.com
- 这里有 Espressif 官方和社区维护的开源组件。
GitHub 搜索 GitHub
- 搜索
esp32 component,可以找到大量 ESP32 相关的开源组件。
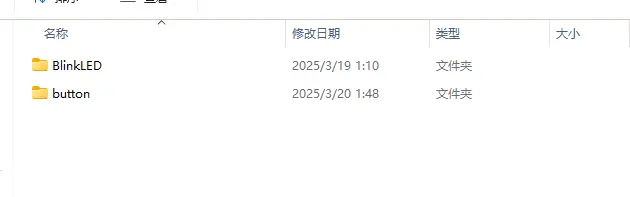
- 直接将
button 文件夹复制到工程组件文件夹中
- 在
main/CMakeLists.txt 中注册对应组件(或许不是必须)
| idf_component_register(SRCS "main.c" |
| INCLUDE_DIRS "." |
| REQUIRES BlinkLED |
| REQUIRES button) |
一般组件名为文件夹名,除非 button/CMakeLists.txt 中有重命名的操作
| idf_component_register(SRCS "BlinkLED.c" |
| INCLUDE_DIRS "include" |
| COMPONENT_NAME "led_driver") |
使用 idf.py add-dependency 可以快速下载并集成组件到工程中,避免手动管理依赖的繁琐操作。然而,该方式依赖网络,必须联网才能下载或更新,在离线环境下可能带来不便。此外,组件无法直接进行个性化修改,一旦文件发生变动,编译时会自动下载官方原版进行覆盖,影响自定义调整。
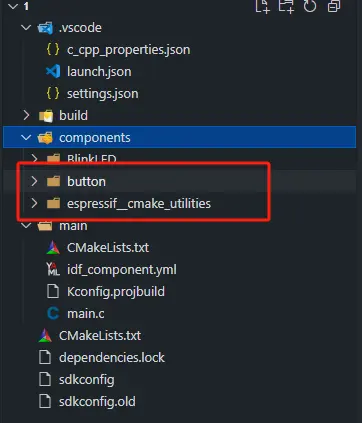
将联网组件更改为本地组件:
- 将文件移动到
component 文件夹中
- 修改依赖文件
- 对于 Espressif 组件仓库,查看
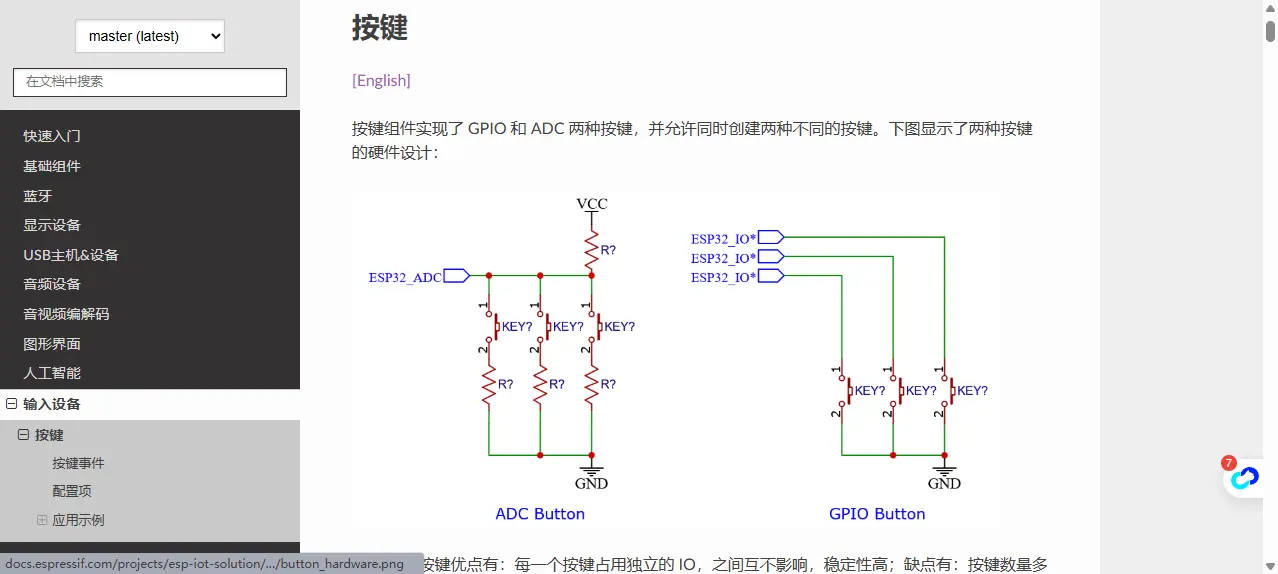
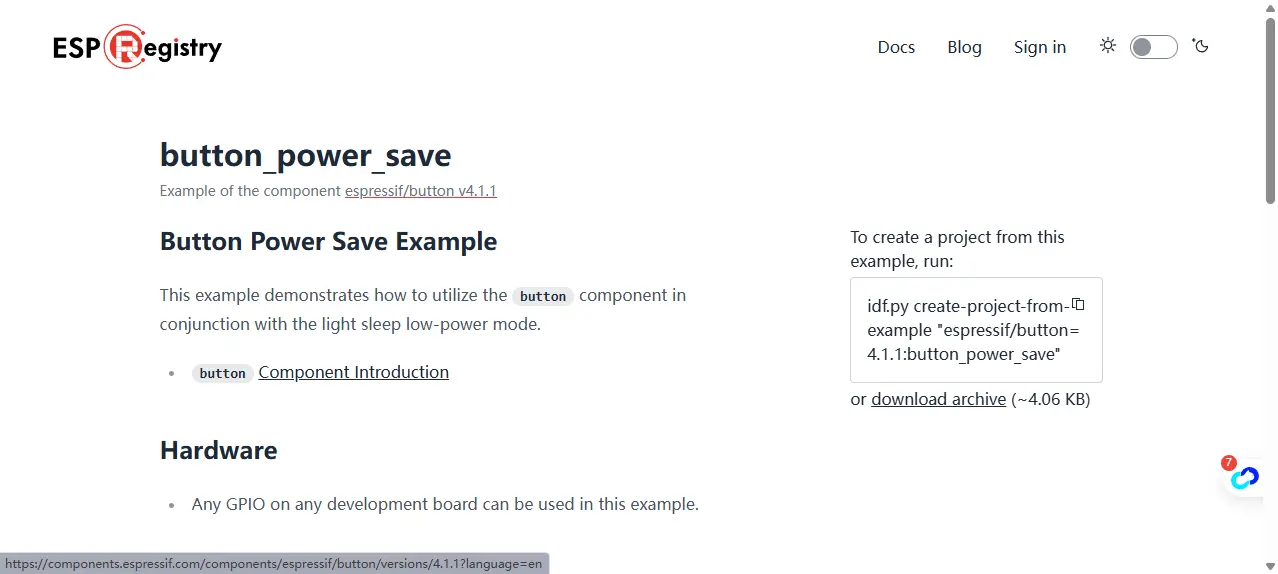
在线文档或者示例
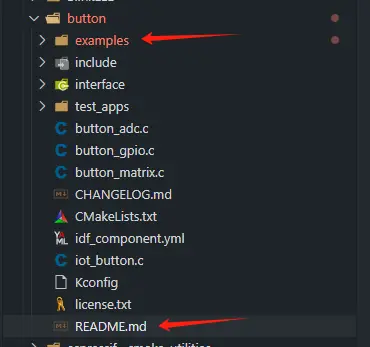
- GitHub 下载开源组件,查看
examples 或者 Readme.md
实现 按键控制 LED 的功能,即当用户 按下按键 时,LED 切换开关状态(亮 / 灭)。
| #include "freertos/FreeRTOS.h" |
| #include "freertos/task.h" |
| #include "esp_log.h" |
| #include "BlinkLED.h" |
| #include "iot_button.h" |
| #include <stdio.h> |
| #include "esp_pm.h" |
| #include "esp_sleep.h" |
| #include "esp_idf_version.h" |
| #include "button_gpio.h" |
| |
| #define BUTTON_GPIO 0 |
| #define BUTTON_ACTIVE_LEVEL 0 |
| #define LED_DELAY_MS 5000 |
| |
| static void button_event_cb(void *arg, void *data) { |
| static int led_state = 0; |
| iot_button_print_event((button_handle_t)arg); |
| led_state = !led_state; |
| gpio_LED_level(led_state); |
| } |
| |
| void app_main(void) { |
| |
| setup_gpio(); |
| |
| |
| button_config_t btn_cfg = {0}; |
| button_gpio_config_t gpio_cfg = { |
| .gpio_num = BUTTON_GPIO, |
| .active_level = BUTTON_ACTIVE_LEVEL, |
| .enable_power_save = true, |
| }; |
| button_handle_t btn; |
| esp_err_t ret = iot_button_new_gpio_device(&btn_cfg, &gpio_cfg, &btn); |
| |
| if (ret != ESP_OK) { |
| ESP_LOGE("BUTTON", "Failed to create button device: %s", esp_err_to_name(ret)); |
| return; |
| } |
| |
| ret = iot_button_register_cb(btn, BUTTON_SINGLE_CLICK, btn, button_event_cb, NULL); |
| if (ret != ESP_OK) { |
| ESP_LOGE("BUTTON", "Failed to register button callback: %s", esp_err_to_name(ret)); |
| return; |
| } |
| |
| |
| while (1) { |
| vTaskDelay(LED_DELAY_MS / portTICK_PERIOD_MS); |
| } |
| } |